Saturday, February 23, 2013

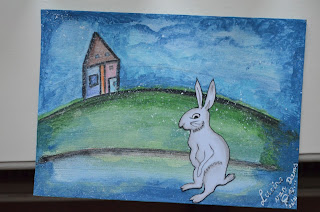
1 House + 1 Rabbit


Page created using card board, acrylic paints from Folkart and Decormatt, watercolor pencils (unknown brand) and a charcoal pencil. The rabbit is drawn on Gina K. Pure luxury card stock and colored with my Copic markers.

Used: W00, W1,W3 (and W9 for the borders).

Matching pieces

For this postcard I used an image from sweetpea stamps. Colored with prismacolor pencils and the skin, hair and flowers with my Copic markers. For the background of the postcard I cut out matching pieces of patterned card stock. There is a lot of colors there, so I did not add any embellishment. The destination of this postcard is Taiwan.


Another postcard, I would say semi-handmade. I got a large advertisement, it looks like a large postcard. I cut out the piece I could use for a postcard. You can read on the front: "With eyes for the world". Now I got a postcard out of an advertisement.


The back of this postcard:


Have a nice weekend!!

Hand drawn

Hand drawn black & white art journal page. Also used Artistcellar and Balzer Designs 6x6 stencils.


Don't Think .... Thank

The title is a quote I found on one of my Yogi Tea satches. It is so true that we have to thank more than think of so many things. A nice prompt for my page, I thought.


Annoying ... I tried a couple of times to fix the auto rotate function. Will try again:-((

Handmade postcard with master board piece

And here it is: my handmade postcard using a piece of my master board created with photo paper and alcohol inks.


The image is a freebie from Saturated Canary digital images. I used wooden flowers and wooden butterflies on the card. I colored them with Prismacolor markers, put some silver and red glitter glue on them. When dried I put some 3D Crystal Lacquer on them. Her legs are on ribbon and behind her head and shoulder you also see ribbon. I finished my postcard with a postcard rubber stamp on the back of the postcard. This postcard was not exactly stamped like the picture below. But just giving you an idea of the back of my postcards.


Master board pieces

For a swap @ swap-bot.com I created master board pieces. And oh, oh, oh.... I think I went overboard! Keeping a balance between background colors and stamping is the key, I think. Still nice pieces, though-_-

The idea is to create a background to use for your projects. A nice background for a handmade greeting card or to use in your art journal. Think of more ideas:=)

I used Gina K. Pure luxury card stock, which measures 8,5 x 11 inches. I used my Tim Holtz ink blending tool. For inking I used several Stampin' Up and Close to my Heart ink pads; you can see the colors in the background. I used quite a lot rubber stamps. These were stamped with Memento black ink. Then I cut the 8,5 x 11 inches card stock in four equal pieces with my Your Story paper cutter. I ended up with four different pieces of master board. Very nice and unique, since every piece is very different.


I like this idea and I wondered how it would work out with alcohol inks. I know that glossy paper is used for these inks, but I don't have any of it. So I took photo paper, which is also glossy. I took care while trying this out and I ended up with nice pieces of master board. In a next post I will load up a handmade card crated with a piece of this master board out of photo paper using alcohol inks from Tim Holtz.

One this piece I created dots on the photo paper. I used Tim Holtz alcohol inks: Caramel, Stream and mixatives Silver.


Then I tried to create kind of stripes on the photo paper. On top of that I stamped another layer using the  Rubbernecker rubber background stamp (French script) with distress ink (vintage photo). I will use these master board pieces for making cards.


You can use it as one piece or you can cut it into smaller pieces .. inchies of just little squares to create what you like. Make your master board pieces and enjoy!
Little nephew's birthday card

Making pictures at night seldom have a nice result. This is the best of pics I made of the birthday card for my nephew. I embossed the stars with clear embossing powder. The rubber stamp I used to emboss is from Rubbernecker.com. I then went with a sponge covered with ink over the star to create the yellow background. To finish off I rubbed the color off the embossed parts. For the background of the stars I used Stampin' Up Yoyo Yellow. With a Martha Stewart punch I created the lace ribbon, cut out of paper. With the help of two golden brads I keep the "ribbon" in place. The image Tyler from The Greeting Farm rubber stamp set 'Creepin Crew collection'. I colored him a while ago with my Copic markers and he was waiting to be used. The patterned card stock is from the Bo Bunny 'Blast Off!' collection.

Second attempt

First attempt


Sunday, February 17, 2013

Sweet thing

A postcard meant to send, but my daughter thinks I should not send it..... And now? I don't know ... I am thinking ... what to do?


I created this postcard with the theme of the challenge @ scrapbitzcopics.ning.com. The challenge is all about ** Girly time**. The color on the image must be girly and feminine. And since I am in time to join the challenge, I'll enter this postcard for the challenge. I coloured this image a while ago with Copic markers. She is a digistamp of the Saturated Canary collection. I love there images and I have a collection for their cute girls. The back of this postcard is as an original postcard. Cute, isn't she?

Another card is here on my table, but I don't have a picture of it. It is a masculine boy birthday card. Well, more about it tomorrow, I guess♥

The Beauty of Nature

In the round robin named 15 artist, 15 journals, 15 months I added my page for Marie in her beautiful book. The theme of her art journal is 'The Beauty of Nature'. Now I have these rubber stamps of different human beings. So I interfered these images on the page with animals and flowers (flora & fauna), the blue represents the sky, yellow the sun. I really like this page♥☺


February challenge

My creations for the February challenge @ dolldreams: Friendship. The challenge started a while ago. A couple of weeks ago I found time to complete this challenge.


The page is created with acrylic paints, prisma color pencils, alphabet stamps and stencils from Crafter's Workshop (Balzer Designs) and Artistcellar.

Sweet dreams

Last year I participated in a chunky page swap. I created a sleeping girl. I like it so much and I decided to make one for myself. No, it is not exactly the same painting. This is a different 5x7" page. Isn't the duvet cute?


In September 2012 I draw this lady. Didn't know which colour to use. I wanted a pretty lady. Page finished and done. I .... am satisfied:-))


Saturday, February 9, 2013

Is He there?

In the past weeks I was too busy. Snowy weather gave me the opportunity to stay at home. The spare time I had I used to play in my art journals. I did some art journal pages and drawings. Quite a few drawings; some of them so need some colour. The pictures I took are poor, but I'll post them. Other pictures will follow soon:-)

The following pages are based on prompts. The first prompt: Where did you lived as a child: which town, country, suburb, etc.? I grew up in Surinam, a country in South America. Last year, in November, I went for a second vacation in 2012. Love the weather, there!


Prompt 2: What are your views on religion?


This last art journal page had to have a mouse and a house on the page. I wondered if a mouse could be men's best friend? I wonder ...


All the page are created on 5x7 inch pages, using cardboard of food packages.